Quick Start: Building a Distro to Order Image
About This Task
The localhost/d2o podman container created in Setting Up Your Development Environment for Distro-to-Order Image Builds provides a ready-to-use build environment for creating distro to order system images. In this procedure, you will learn how to build and deploy the default image, and make changes to the image configuration to build and deploy your updates.
For additional information on the distro to order components and how the localhost/d2o container fits in, see Distro-to-Order Component Overview
Before You Begin
You must have a project directory with d2o-tool Git repository and a built localhost/d2o podman image. For details, see Setting Up Your Development Environment for Distro-to-Order Image Builds.
You must have Python3 with libvirt-dev modules installed on your Linux development host. For details, see Quick Start Overview.
Quick Start - Build and Deploy an Image
Build the default image included with the d2o-tool repository.
Run the following command from the d2o-tool directory.
$ just build-image

rm -rf build bootable.qcow2
Creating image and workspace.
✅ Loading core module.
✅ Loading base module.
✅ Loading initrd module.
‣ Validating certificates and keys
‣ Syncing package manager metadata: no incremental image has a cache manifest
‣ Syncing package manager metadata

---- lots of build output ----

‣ [main]  /var/tmp/d2o/d2o-workspace/mkosi.output/elxr_26.04.02-core.raw size is 5.0G, consumes 518.9M.
This command may take some time to run depending on your host system resources. Once it completes, the new .raw image location, in this example elxr_26.04.02-core.raw, displays in the terminal.
Set permissions for the build container.
This step is necessary to ensure QEMU will have permissions to use the build components, which build as root inside the localhost/d2o container, when you deploy the image in the following step.
$ sudo chown <user> -R build/d2o-workspace
Deploy the image.
The following example will open a new graphics-based QEMU terminal and deploy the image from the previous step.
$ just run-vm
Once the boot process completes, enter root for the user name and elxr for the password to log in.
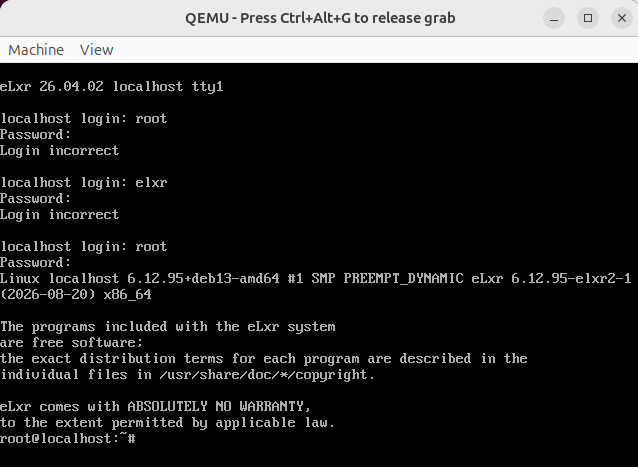
Optionally shut down the QEMU instance.
$ cat shutdown now
Modify and Deploy an Image
Now that you know how simply building and deploying a distro to order image is, let’s dive a little deeper and learn how to make changes to an existing image configuration. These changes include modifying the variants/elxr-core.yml file, and shared mkosi.conf files. For additional information, see Distro-to-Order Component Overview.
In this example, you will change the image name and add the hello package.
Remove the build/d2o-worksace directory.
$ sudo rm -rf build/d2o-worksace
Edit the variants/shared/image/base/mkosi.conf file to add the hello package to the Packages: section to include the package in the image build. For example:
[Content]
Packages=
    adduser
    apt
    apt-utils
    console-setup
    debconf
    hello
    ---snip---
Optionally change the root password.
By default, the root password is set to elxr. To change this value, edit the variants/shared/profile/core/mkosi.conf file and change the RootPassword value.
Rebuild the image.
$ just build-image
Set permissions for the build container.
$ sudo chown <user> -R build/d2o-workspace
Deploy the image.
The following example will open a new graphics-based QEMU terminal and deploy the image from the previous step.
$ just run-vm
Once the boot process completes, enter root for the user name and the password set in Step 3, above, to log in.
Verify that the new package is installed.
$ hello

Hello World!
Optionally shut down the QEMU instance.
$ cat shutdown now
Results
You have learned how to build a default eLxr system image and make changes to it by simply modifying configuration files.