Installing eLxr on an Arm64 or x86 Host with KVM/QEMU
About This Task
In addition to performing installations on hardware and commercial VM software, you can also use the command line to download, install and deploy with KVM/QEMU. This applies to an Arm64 or an x86-64 Linux host device.
The eLxr team does not recommend this installation method for production systems, as it uses the latest QEMU binaries and will not be optimized for any specific hardware. It provides a method to deploy an image quickly on any device that also supports QEMU x86_64 binaries.
Before You Begin
You must have Internet access to download an eLxr 26.04 image from the command line.
You must have the QEMU packages required to support KVM, including: qemu-kvm, qemu-system-x86_64, libvirt-daemon-system, libvirt-clients, and bridge-utils.
Procedure
Download the eLxr Server image.
$ curl -LO https://downloads.elxr.dev/elxr-26.04.01-amd64-NETINST-1.iso
Create an elxr.qcow2 file to use as a virtual drive to install eLxr to for use with QEMU.
$ qemu-img create -f qcow2 elxr.qcow2 40G
Launch the image, referencing the downloaded eLxr server image, to perform the installation.
$ qemu-system-x86_64 -machine q35 -m 4096 -smp 2 \
-cdrom elxr-26.04.01-amd64-NETINST-1.iso \
-drive file=elxr.qcow2,format=qcow2,if=virtio -boot d
If you have a graphics-enabled console, the eLxr Server 26.04 image will boot to the Installation selection window.
Here you can choose whether you want a graphical or console-based installation.
If your terminal does not support graphics, the installer will default to console-only. The following procedure uses the graphics-based console, but the installation steps and choices will be the same for both graphics- and console-based installations.
Note
This image also performs an automatic installation if you do not select an option quickly. Once the options are available, use the UP or DOWN arrow keys to halt the timer.
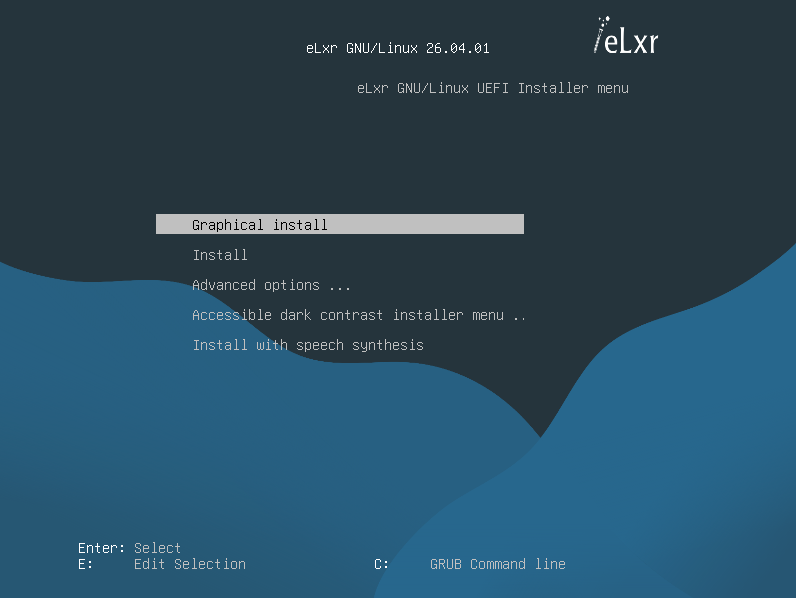
For this procedure, select Install, then press ENTER.
Note
The installation options in this step only refer to the installation steps. The installed image is console-based.
Work your way through the installation prompts to complete the installation. You will be prompted to provide the following information:
localization information, such as language, country, and keyboard type
a hostname for the system and additional networking information
a root password and additional user account
clock and timezone
guided or manual disk partitioning - select Guided - use entire disk, then select All files in one partition
You will manually need to select Yes to write the partition(s) to disk to continue.
The installation will continue until all base components are installed.

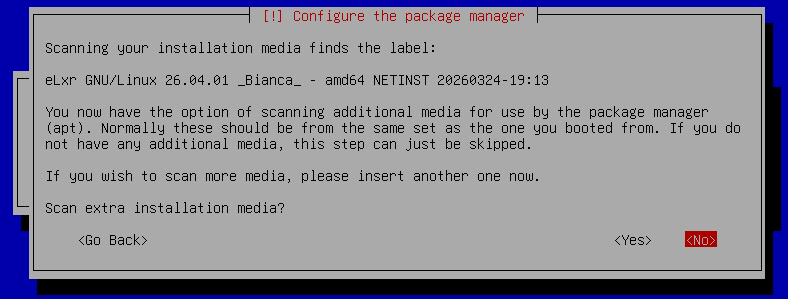
Choose whether you want to scan additional media to include in the APT Package Manager’s package sources. If you do not have any additional source repositories (default), select No, then click Continue.
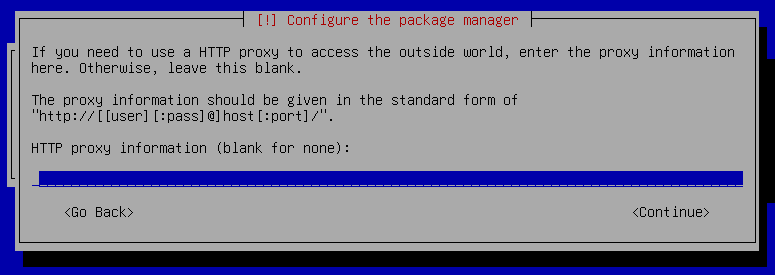
If you require a HTTP proxy to access the Internet from your eLxr image, enter the proxy address and port information. If you do not require a proxy, leave the field blank. Click Continue.
At the Software Selection window, choose any additional software options. By default, the installer selects Debian desktop environment, GNOME and standard system utilities. This installs the GNOME desktop with a standard set of utilities.
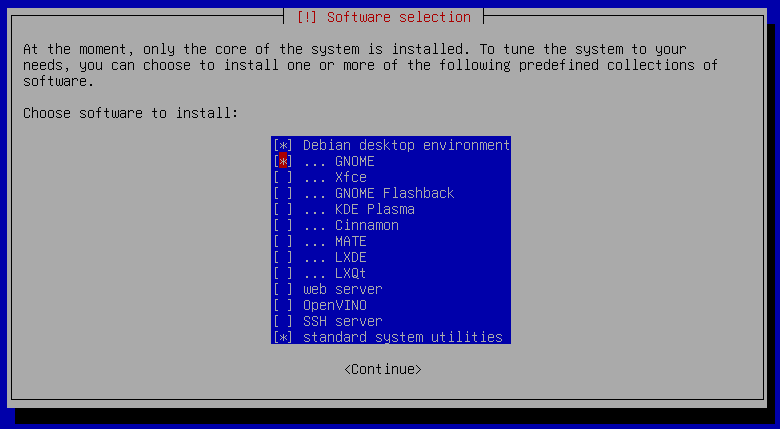
To install a different window manager, deselect GNOME and select another from the available options.
To install a console-only image, deselect Debian desktop environment and any other desktop manager. This procedure uses this option for demonstration purposes.
Note
To change your options, use ARROW keys to navigate, SPACE to select or deselect, and TAB to select CONTINUE when finished.
Optionally select other software, then click Continue.
Note
If you select more than one desktop environment, a window will prompt you to choose a preferred window manager.
The installer will add the additional components.
Install the GRUB bootloader to make the image bootable. For this procedure, select /dev/vda, then press RETURN.
When the Installation complete window appears, close the QEMU window.
Since you are working from a command-line installation, there is no way to remove the installation media. Rebooting the system will try to use the installation CD and restart the installation process. To start the installed image, go to the next step.
Run the following command to boot the eLxr .qcow image.
$ qemu-system-x86_64 -machine q35 -m 4096 -smp 2 \
-drive file=elxr.qcow2,format=qcow2,if=virtio -boot d
This example uses two CPUs (-smp 2) and four GB (-m 4096) memory to run the image. If your hardware device has more cores and memory to use, you can increase these options for better performance.
On system restart, select the kernel option you want to use from the GRUB menu, either standard or rt (real time). You will only have a moment to make this selection.
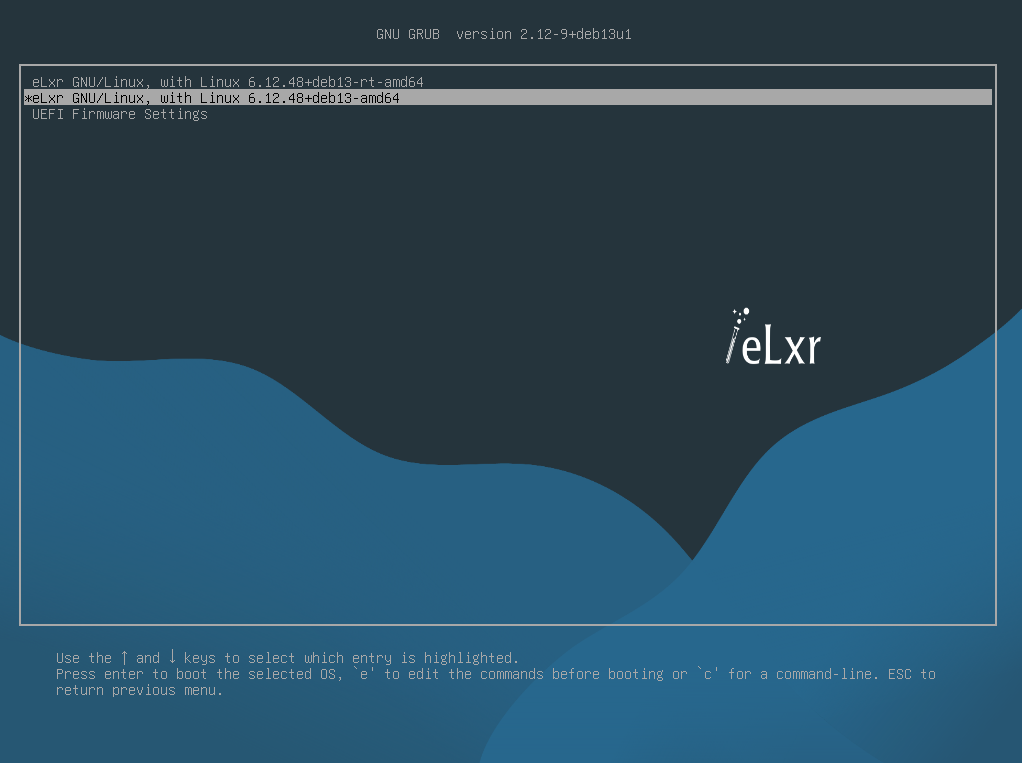
Important
The kernel option you choose will become the default for your system. Only choose the rt kernel if the system requires deterministic processing.
Once it boots, log in as root or as the user you set up to continue.
elxr-server login: root
Password:
Linux elxr 6.12.95+deb13-amd64 #1 SMP PREEMPT_DYNAMIC eLxr
6.12.95-elxr1-1 (2026-07-17) x86_64 GNU/Linux

The programs included with the eLxr Linux system
are free software;
the exact distribution terms for each program are described in the
individual files in /usr/share/doc/*/copyright.

eLxr Linux comes with ABSOLUTELY NO WARRANTY,
to the extent permitted by applicable law.
Set Up Secure Boot
If your hardware device supports EFI Secure Boot, you will need to set up your hardware and eLxr image to boot with custom keys. For details, see Enabling Secure Boot in eLxr 26.04.
Results
Now that your eLxr 26.04 image is running, you can install a package or packages from the eLxr package repository. For details, see Adding and Updating Packages.